 Tweet
Tweet
Re: Salvage Project w/pix
Looks great, keep the pics coming.
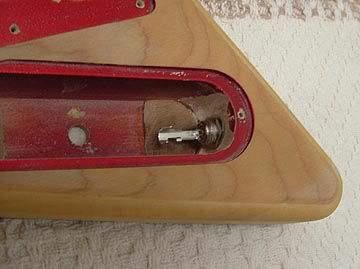
BTW, I was just thinking...will you have enough room to adjust the trem claw in order to float the bridge correctly? You said you trimmed off the springs about 1cm, will that be enough to do the proper adjustment?
Just a thought, that would suck if you found out you needed more room after you painted it.
Looks great, keep the pics coming.
BTW, I was just thinking...will you have enough room to adjust the trem claw in order to float the bridge correctly? You said you trimmed off the springs about 1cm, will that be enough to do the proper adjustment?
Just a thought, that would suck if you found out you needed more room after you painted it.

Comment