Announcement

Collapse
No announcement yet.

Jackson Performer PS2 customization...

Collapse
X
 
  • Filter
  • Time
  • Show
Clear All
new posts

  • Jackson Performer PS2 customization...

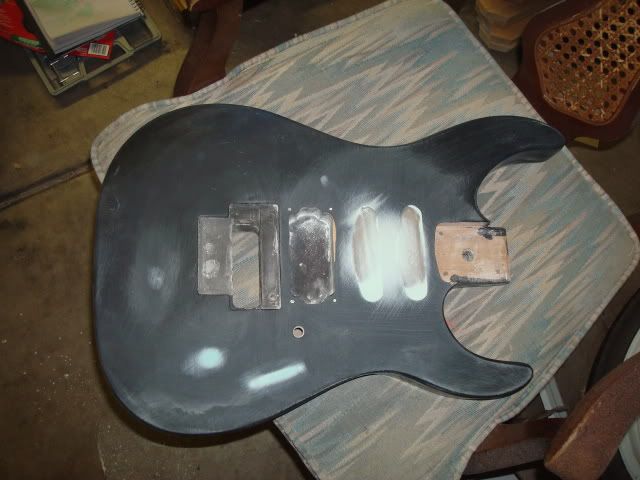
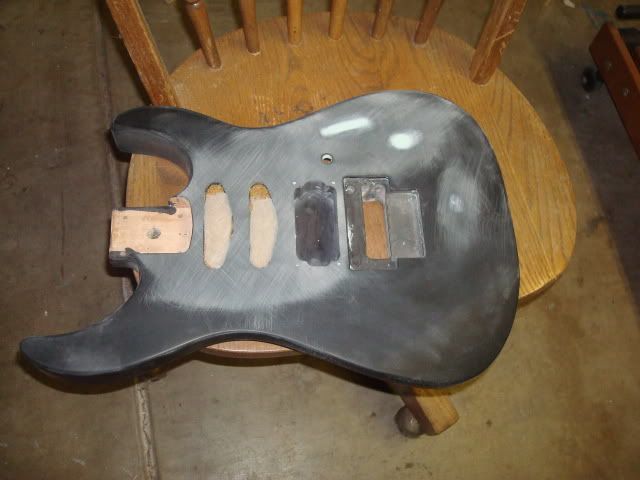
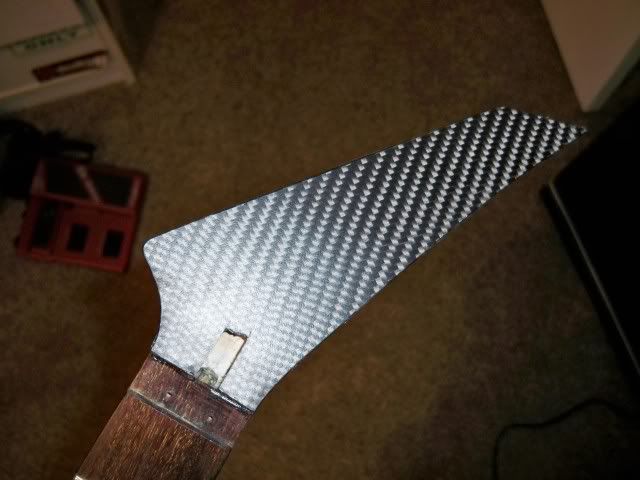
    Got a Jackson Performer PS2 currently under construction. Filled the 2 single coil cavities and put a real carbon fiber top on it, currently working on the headstock carbon fiber and trying to find somewhere I can get a brushed silver jackson decal for it....

    Workin' on the body:


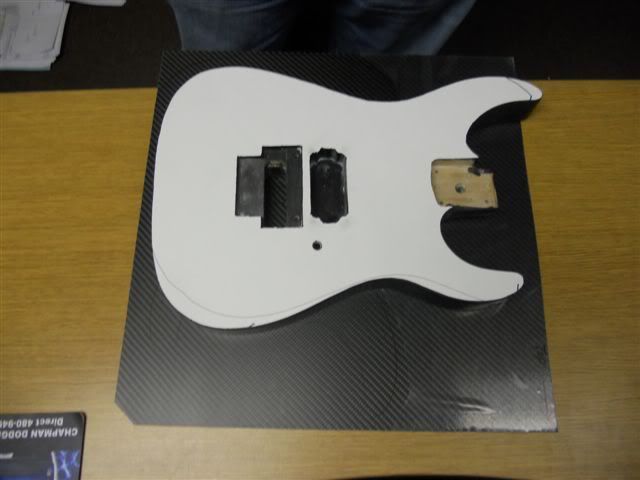
    Template for the Carbon Fiber:
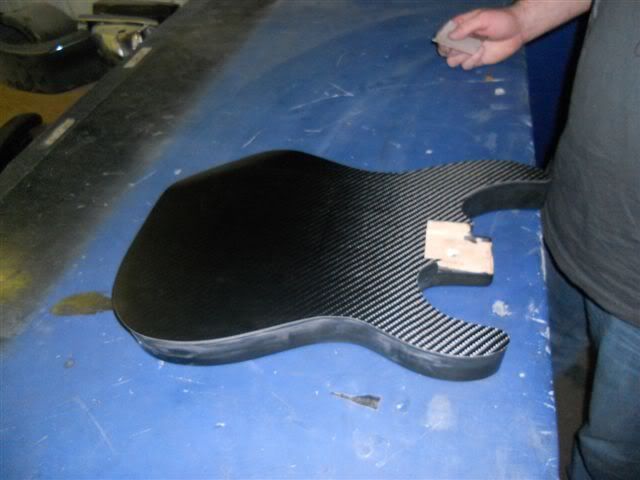
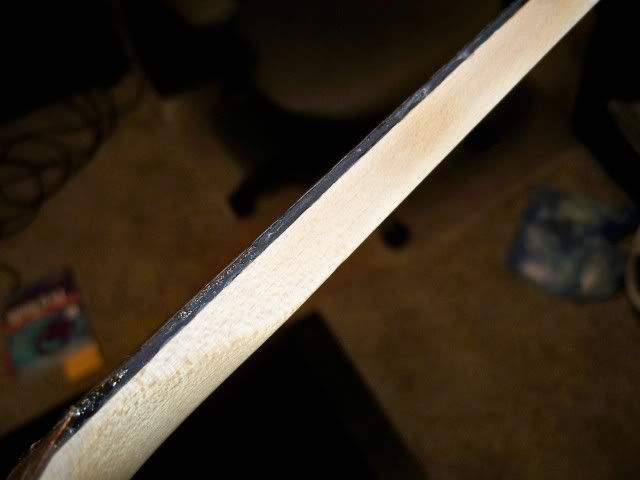
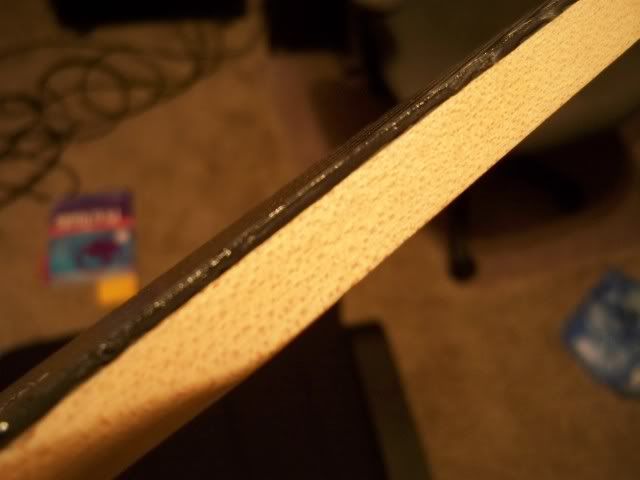

    Sanding the Edges:


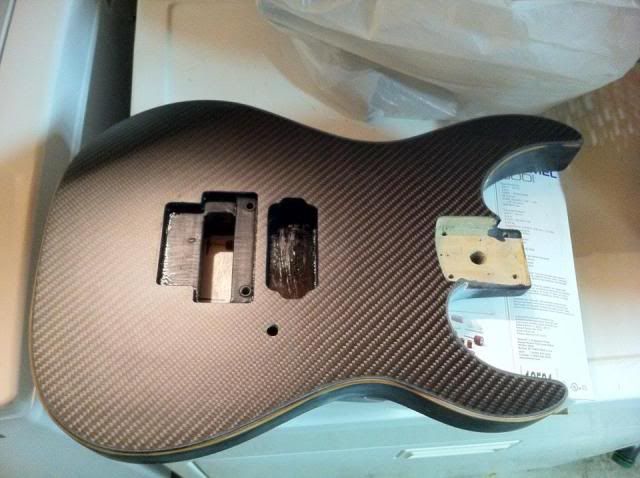
    Routed cavities.....


    More to come!!!

  • #2
    Damm!

    I love that top!

    Comment


    • #3
      Oh hell yeah! That's awesome. Can't wait to see how it turns out.

      Comment


      • #4
        Put some water on it to simulate clear coat, check out that D.D. DEPTH!

        Comment


        • #5
          Damnn!

          Comment


          • #6
            Oooh, this is awesome. Gotta love carbon. I have a few questions if you don't mind:

            1) What did you use to fill your pup cavities? I did a neck pup cavity fill with a wood piece (poplar from Home Depot), had 45 degree bevels on all edges, filled it with Bondo, let it cure for 3+ days, and the damn pickup outline STILL showed up a couple of weeks after I finished it. I'm always trying to glean knowledge off of those who can do successful fills, so please share your wisdom!

            2) Regarding the carbon, how did you go about adhering it to the body? Looks like pre-preg based on the second photo down, so I'm assuming you just used a heat gun or something, unless you're a baller and actually have an autoclave? (pretty sure the body would burn to ashes in one of those haha)

            Anyway, looking forward to seeing the progress, it's looking awesome so far!
            Last edited by S1I2F3; 02-29-2012, 09:38 PM.

            Comment


            • #7
              Originally posted by S1I2F3 View Post
              Oooh, this is awesome. Gotta love carbon. I have a few questions if you don't mind:

              1) What did you use to fill your pup cavities? I did a neck pup cavity fill with a wood piece (poplar from Home Depot), had 45 degree bevels on all edges, filled it with Bondo, let it cure for 3+ days, and the damn pickup outline STILL showed up a couple of weeks after I finished it. I'm always trying to glean knowledge off of those who can do successful fills, so please share your wisdom!

              2) Regarding the carbon, how did you go about adhering it to the body? Looks like pre-preg based on the second photo down, so I'm assuming you just used a heat gun or something, unless you're a baller and actually have an autoclave? (pretty sure the body would burn to ashes in one of those haha)

              Anyway, looking forward to seeing the progress, it's looking awesome so far!
              i'm curious, too. pls do share your experience with us. thanks!

              Comment


              • #8
                what is the size of the nut on your PS2? I wanna get a new floyd for mine.

                Comment


                • #9
                  I 2-part epoxied tight fitting blocks of wood in, you want to have as little glue/filler as possible, titebond wood glue doesn't work good if there are gaps and since I could never cut a block of wood to perfectly fill a pickup cavity, I went with 2500psi epoxy. Then I blocked the top of the body with a longbord to ensure everything was evenly flat. Afterwards I then had to use a little "sealskin" which is fine autobody filler (that you would use over bondo after sanding to fill pinholes or for repairing minor dents, etc). I also could have used more epoxy.

                  I also dont care about the .01% that this has affected the "tonality of the guitar body" or whatever shit guitar ANALysts say about finishes, layers, etc, hehheh.

                  NEVER buy BONDO brand anything. Find a collision/paint store and get quality products. BONDO is like the kraft singles of body fillers.

                  Also, people have this misconception when adding hardner to body fillers that if it's warm or hot outside to use less hardener which is incorrect as x amt of filler requires x amt of hardener to catalyze 100% effectively so if you use less hardner to compensate for warmer temperatures instead of buying a slow set hardener to get the proper ratio, it never completely hardens and you would see pickup cavity lines forever. (Sorry, I have been in the collision industry a while, but that is one possibility).

                  I did a lot of research trying to decide how I wanted to do the carbon fiber. I was thinking about getting the raw material and bonding it to the body myself, but I wanted a very THIN option and found www.dragonplate.com and bought a sheet large enough to do the body and headstock with leaving some left over so I can bond to pieces together and make a cavity cover on the back. I bought a sheet that already had 3M adhesive on the back and it was very tacky and secure. You can get plain sheets if you want as well, I think I paid $100 for the sheet I got. I went with a matte finish one too since I would be clearing over it anyways so I think it was a little cheaper because of that.

                  Since there was some adhesive, though very thin, after it was applied and sanded you could see the glue/adhesive line between the carbon fiber and body so I went around the edges with a small pick tool and lightly scraped out any excess adhesive and did a bead of the medium thickness guitar superglue from www.stewmac.com (dries clear) to fill that small void solid and sanded it perfectly smooth with some 320 grit. Perfect!

                  After it was on the body I roughed out the cavity covers with a drill and razor blade, this stuff is TOUGH!!! Then I used the standard router bit that came with my $60 dremel kit, put on the router base/guide and went around lightly until I felt the bit lightly touch the wood of the pickup cavities, and since it was a fine cut router bit, the wood of the body acted like a good guide since you would have to use some pressure to cut into the wood itself, but it cut the carbon fiber easily. As long as I maintained a little patience my chances of screwing it up were very very small. Spent about 30 minutes routing the carbon fiber.

                  I'm currently trying to decide what color I want to paint the guitar body, I plan to mask around the body possibly with black to give it a fake binding, or I may just fine-line mask right at the seam of the carbon fiber and do a charcoal gray, then clear the entire guitar. Also once it's done I plan to overlay some art my good friend's late father drew (reminds me of Rob Zombie's art style) of a monster hanging out the window of a Z06 Vette with it's hand on the shifter.


                  WOOD BLOCKS epoxied and sanded before skim coat of filler: (you can see there were some
                  minor low spots in the epoxy/cavities by where it's shiny that needed more attention).
                  Last edited by toner; 03-01-2012, 01:38 AM.

                  Comment


                  • #10
                    Originally posted by unclesprinter View Post
                    what is the size of the nut on your PS2? I wanna get a new floyd for mine.
                    I don't know what the NUT size is, I pulled it off and looked on the bottom, doesn't say anything....

                    Comment


                    • #11
                      Carbon Fiber applied to the headstock and edges sanded the first time:


                      adhesive scraped out some and a bead of the stewmac glue applied (needs sanding still):
                      Once it's sanded you won't even know...

                      Comment


                      • #12
                        Just great looking.love the carbon look.
                        RR ELITE silver sparkle
                        DKMG Bengal
                        KV2
                        SLSMG
                        Charvel Wild Card 6
                        Warlock NJ
                        Epiphone black beauty

                        Comment


                        • #13
                          thanks toner for your detailed description of the process. very useful as a reference.

                          Comment


                          • #14
                            Very nice.

                            Comment


                            • #15
                              Great looking job! I'm sure that carbon fibre will make it feel a lot lighter too....
                              You can't really be jealous of something you can't fathom.

                              Comment

                              Working...
                              X